Dutch Braid Basics
Capsule Wardrobe, starting pieces
I’ve been doing dutch braids on my hair more than ever these days, and I realized my last tutorial on them was from a long, long time ago. I thought it may be helpful for those of you who are new to this braiding technique to be taught the basics.
Your hair texture prior to braiding, dutch or not, is really important. Make sure you prep your hair before you start to ensure your braid will hold and stick together.
In order to show detail, I just did a small braid on the side of my head. Once you’ve mastered the technique, try braiding all your hair! It’s easier to work with smaller sections, so wait until you are confident in your skills before you move on–you are less likely to be frustrated and give up.
I love how stretched out and loose braids are these days. It’s an easy way for your braid to look less severe and a little bit more “lived in”. I love a soft, romantic look, so stretching out the braid after you are finished is key to softening the whole look.
I go into more detail in the video, but start with either day old hair or add plenty of texture with product. My favorite texturizing products can be found here! If you don’t have a texturizing product, try spraying dry shampoo from root to tip!
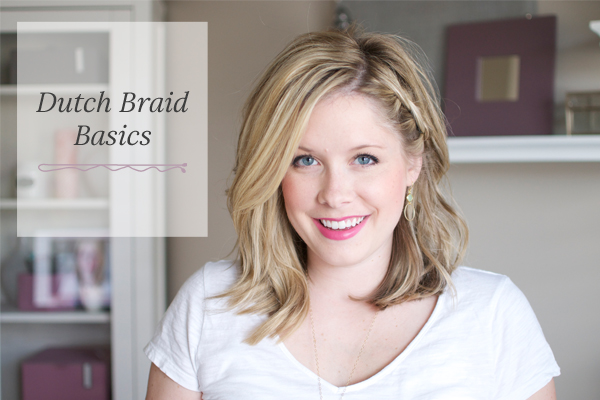
 earrings: The Dotted Poppy (mint Taryn), lipstick: Urban Decay “turn on”, top: Old Navy Maternity

comments
Kate are you gonna do your favorites video for last month? Glad to have you back btw!
yep! Coming soon!
Yay!! My fave!
Great tutorial! This is way cuter than my usual bobby pin for keeping my hair out of my face. 🙂 I will have to give it a shot.
BTW You are so beautiful!!! <3 I love your blog! 😀
This made me so happy! I don’t mind the variety of posts but didn’t realize how much I missed these until I saw this waiting for me– my whole face lit up! Thanks for the tutorial, I love braids.
Incredibly easy to style Dutch braid now. Thank you!
http://pretty-hairstyles.com/
I was similar to you in that I was naturally inclined to Dutch braid instead of French even though I was trying for the latter. This tutorial came at the perfect time though because I’ve been struggling with “picking up” both sides so my braids haven’t been as full as I would like them. Thanks for this post (I love your tutorials)! PS: Kind of random, but has anyone ever told you that you have such a soothing voice?? hehe
This looks so cute. I will have to give this a try! This would be sweet in my little girls hair if I could get her to sit long enough (wink). Thanks.
http://palsywalsyblog.blogspot.ca/
Oh the braid is just beautiful… I recently cut my hair… I wonder if it is too short 🙁 I’m going to try anyway
Love this! Thanks for sharing!
The Style Storm
<3, Christina
Love it! Can’t wait to try it out this week 🙂 Thanks Kate!! <3 Jessica
Yay! Hair tutorial! I love Dutch braids, and I’m so happy you did a hair tutorial! :))
Love the video!
Emma| With A City Dream
Yay! I have been wanting to master the dutch braid – so happy you made this! 🙂
I love this style – my hair is longer but thinner than your’s, and your cut makes me really want to just chop it! I’m too nervous. Haha. Definitely trying this braid out soon though, thanks for the tutorial!
Hi Kate, loved the video! Would you be willing to do a tutorial with the Dutch braid on the full head? I am curious to see how you would style your bang section with this.
Really nice idea for medium hair! Def gonna try it! 🙂
Much love from http://devilreturnsprada.wordpress.com/
Good to know I’m not alone – I’ve also always done a Dutch braid – though I don’t think I knew that was what it was called until today. I always called it a reverse braid. This was just how my hands wanted to naturally braid when I was braiding my hair myself. Oddly enough, if I braid someone else’s hair, it’s the proper French. Something about doing it backward/upside down on my own head …
It’s always been really difficult for me to do an actual French braid, much to my dismay. I’ve just recently started training myself and practicing to really master both braids. Now if only I had thicker hair to really make for a full and beautiful braid, as opposed to the thin fine hair I have now, I’d be all set! 🙂
Can you give more detail how you pin it to your head please? I have fine hair, but a lot of it. When I try to pin a small braid back, it seems like it ends up falling out part way through the day.
That is such a cute braid! I really want to try it out. I am not very good at braiding hair unfortunately. Your tutorial is going to be such a help. Thanks for posting it. 🙂
Kate – I’m having an issue with your website. I’m not able to see any recent posts when I go to your site; I can only see new posts via your twitter links. Do you have any ideas?
Thanks!
Hi Kate! I love all your tutorials, and I’ve been successful at doing most of them. But do you have any advice for what to do with hair that is pretty thin at the hairline? I tried the Dutch braid, and it only “appears” a few inches down. My thin hair makes the braid almost nonexistent up at the top. ??
KATE! I’m literally Laughing out loud- I’m hair challenged. Terribly. But I have committed to changing that & your videos are wonderful!!!!!!! But I can barely braid a regular braid! I LOVE this braid- so, I put my babies to bed & sat down to watch this… I was all yeah, yeah, I got this & then you started actually “braiding” and my brain just STOPPED. I have NO CLUE what I’m doing!!!! I think I’m going to have to get an American girl doll!!!! THANK you for your blog & these tutorials! Also love your Instagram account- except those crazy people who have to tell you weird/mean things & ask you where everrrrrrryyhing is from! You’re adorable! 🙂 thanks again!
Very awesome topic,
Very perfect this a post
http://health2018.com
Wow! So happy to have fallen into your blog. Your hair styles are fantastic! Thank you for helping this girl out! Hahaha..Take care! Koko