A Holiday Hair Tutorial, The Twisted Tuck
nicole’s holiday gift guide
It’s almost mid-december and holiday parties are in full swing! I have a fancy DIY updo to teach you today, created on my beautiful model Michele. It’s ideal for medium to long hair, and is a real show stopper if you ask me!
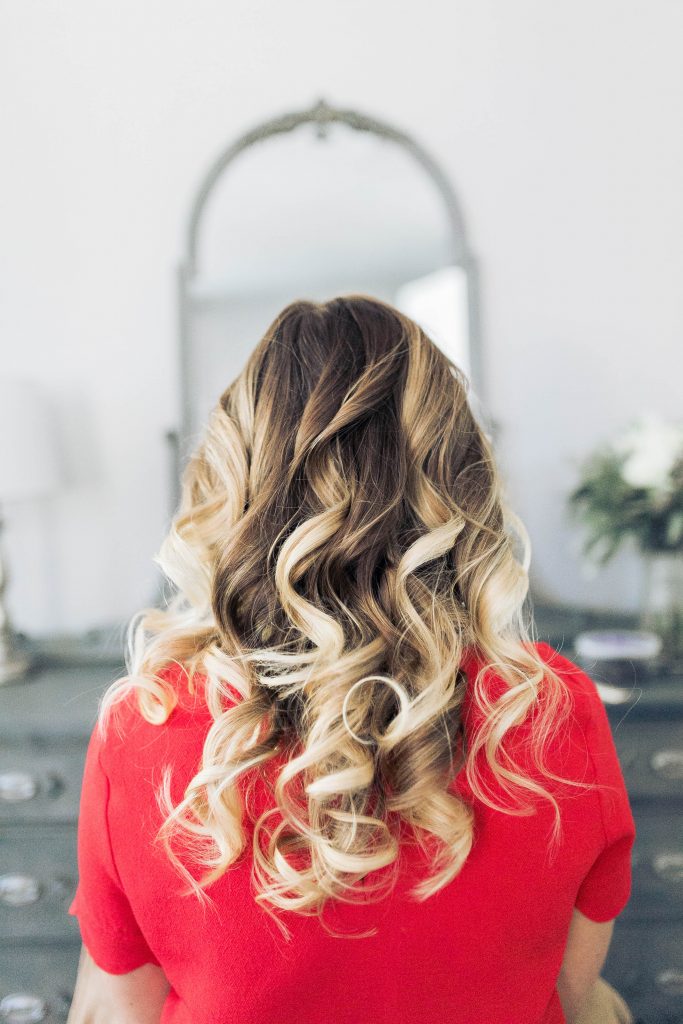
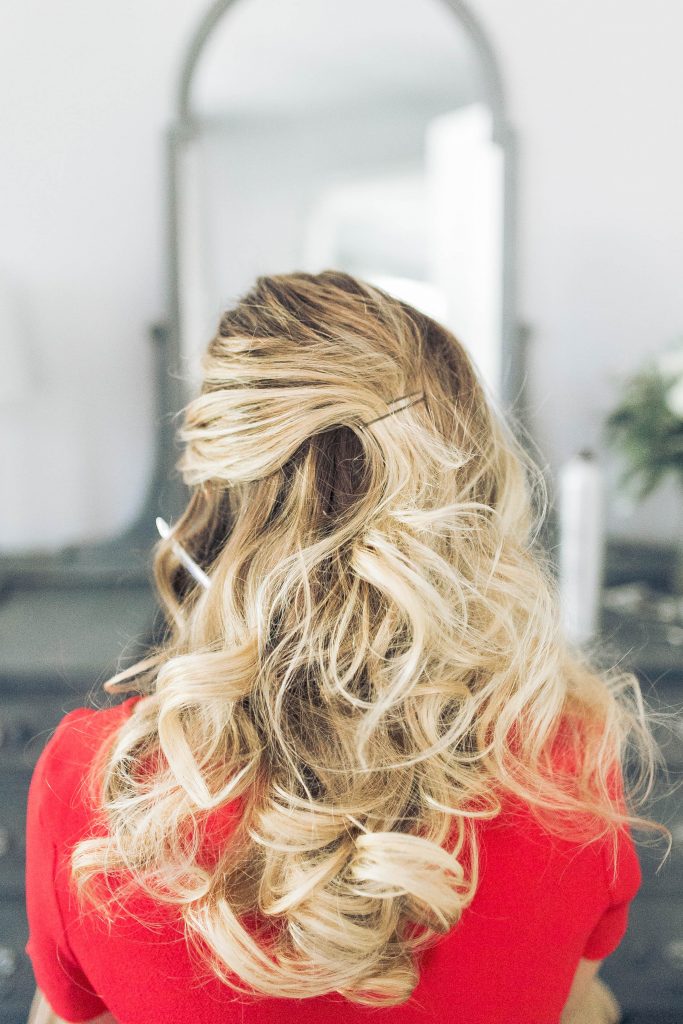
Start out by curling the hair or setting it in rollers. You’ll fight with it a lot less if it’s nice and curled. Don’t spend too much time perfecting them, you are going for big, loose curls. I used this tutorial to create the curls you see below!
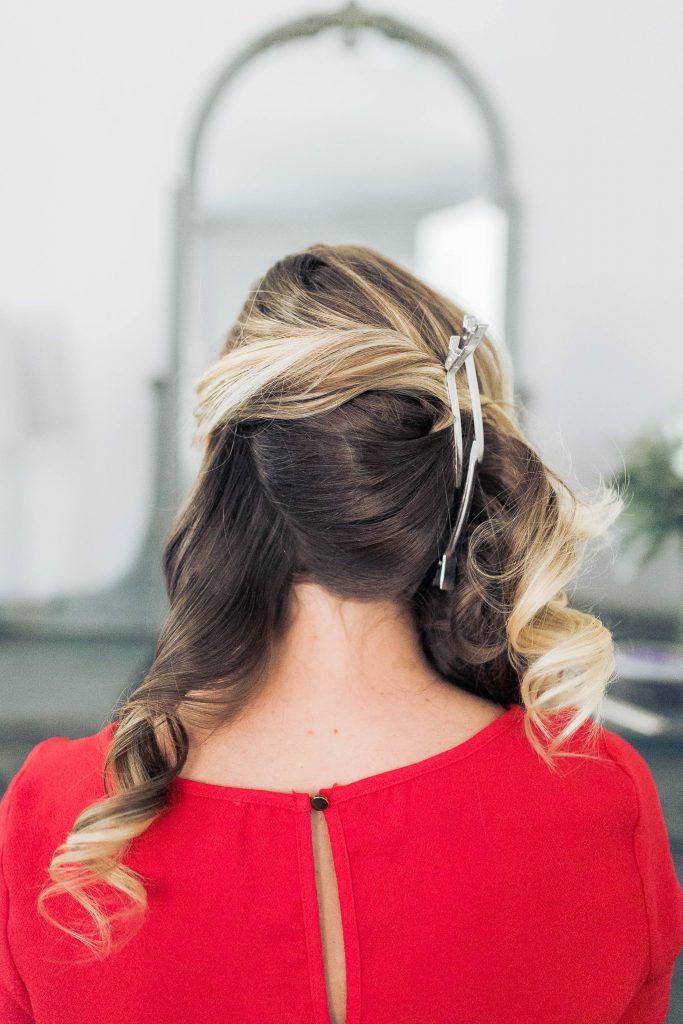
Section a small amount of hair at the left side of the nape and use a duckbill clip to hold it away.
Gather the hair from the top and left side of your head, and pin in place at the center back of your head with a few bobby pins. Try your best to insert these horizontally!
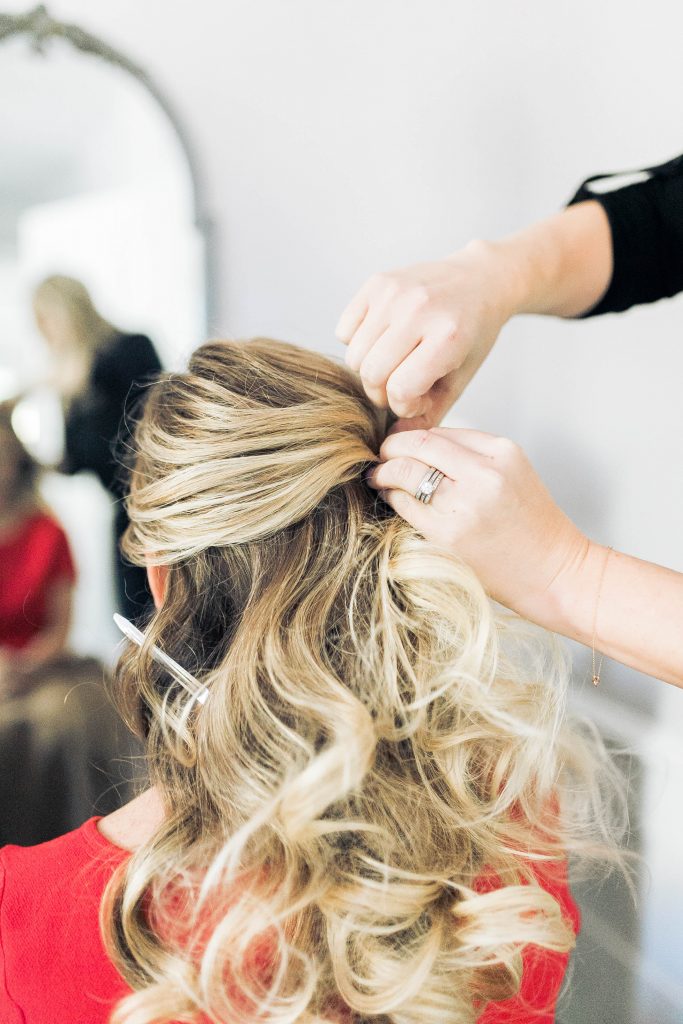
Beginning on the right side, roll the hair toward the back, holding it loosely. Once it’s rolled up to reach the bobby pins, slip a pin under the roll to hold in place.
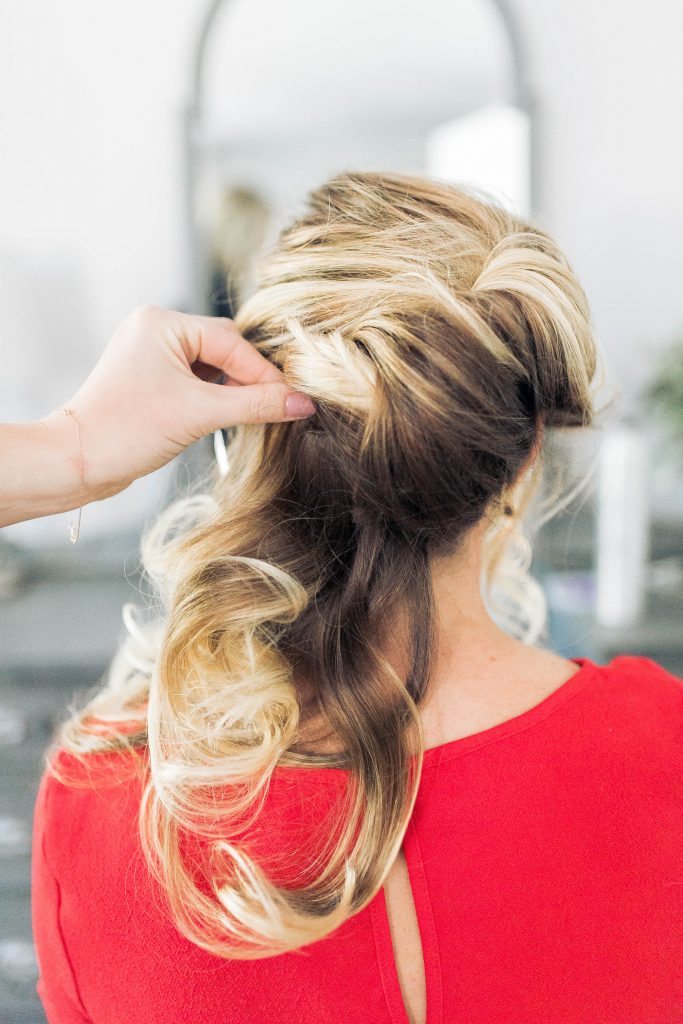
Keep repeating that process, anglin down toward the lower left side of your nape.
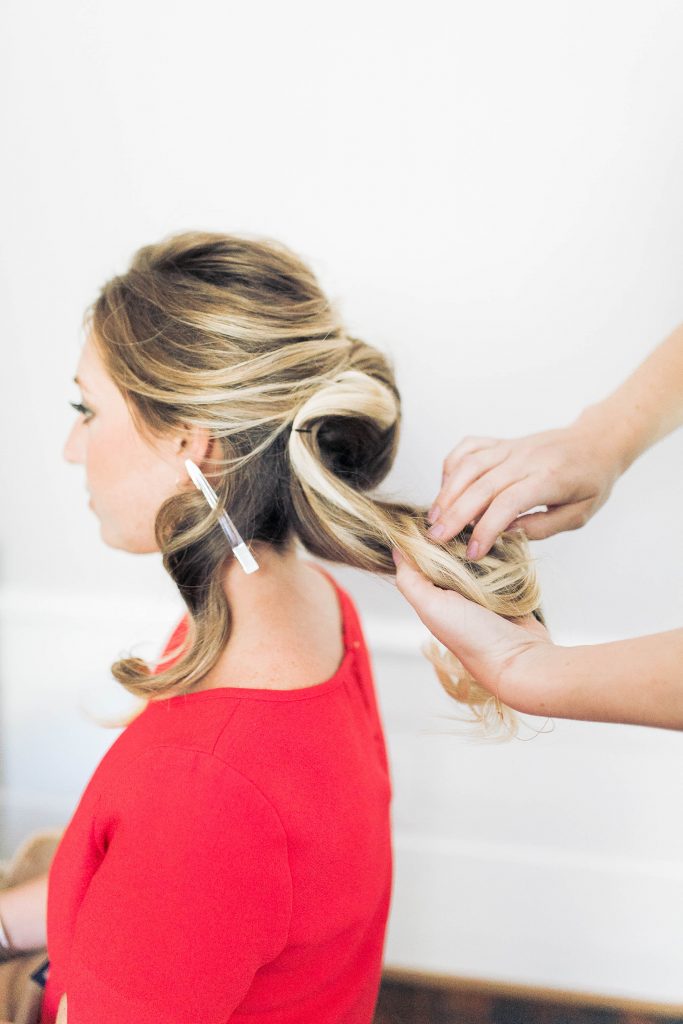
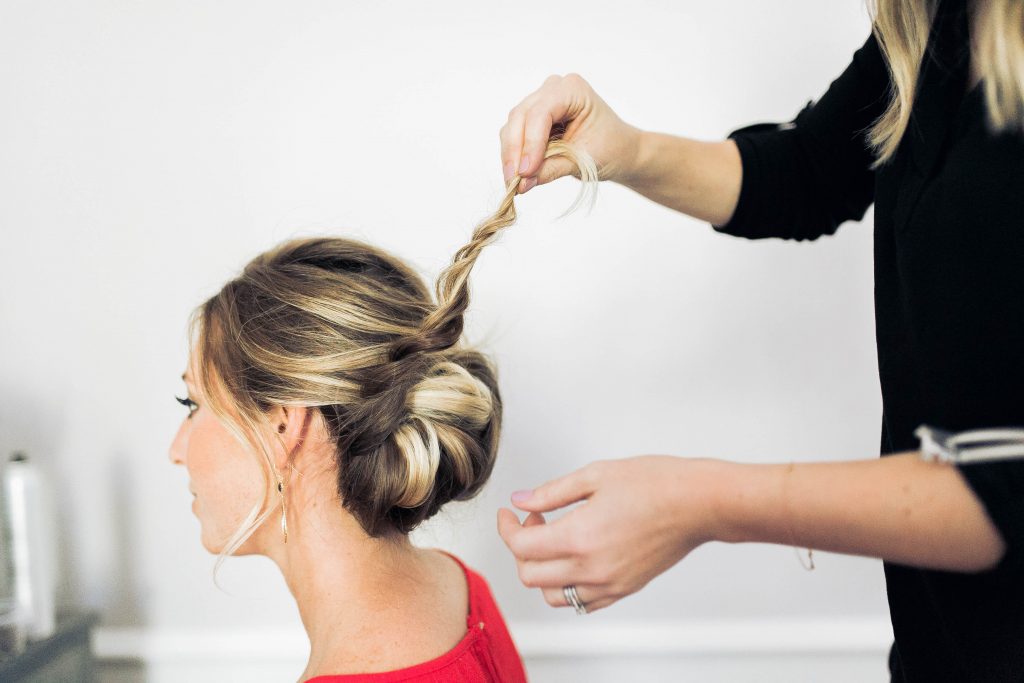
Once the hair is all pinned, release that first section from the clip, and lightly twist it. Then softly pull the twists apart, to make the twist a bit bigger and looser.
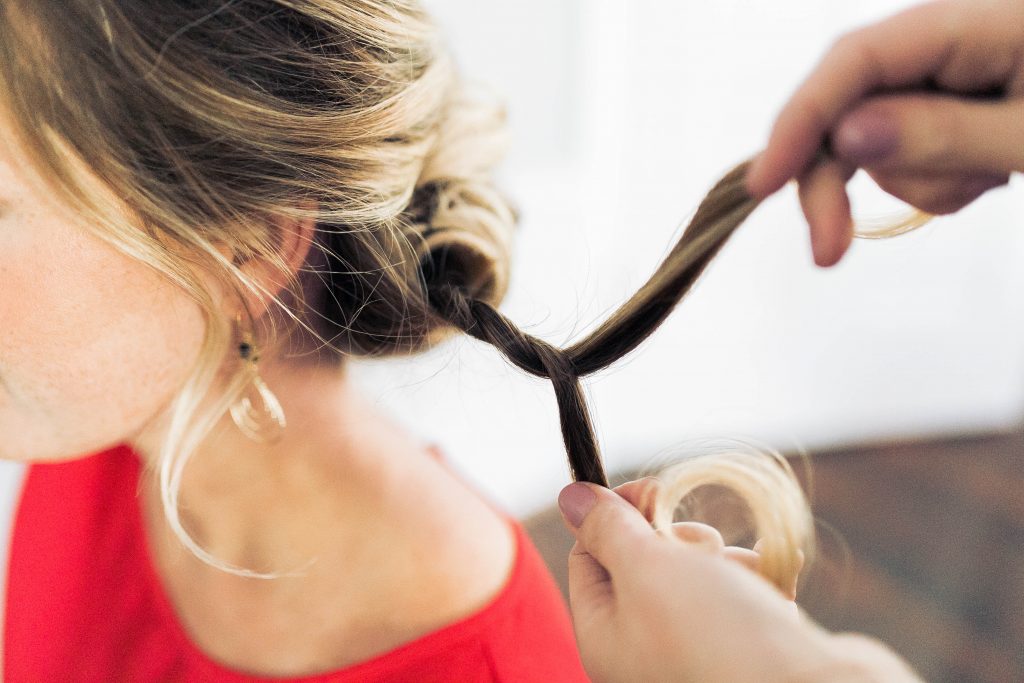
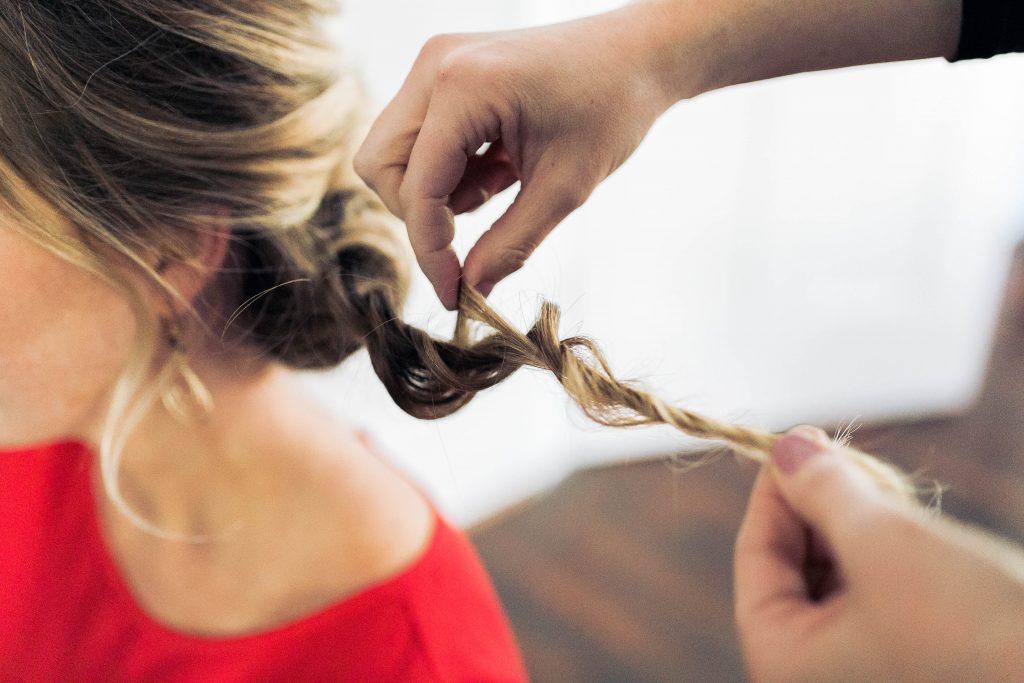
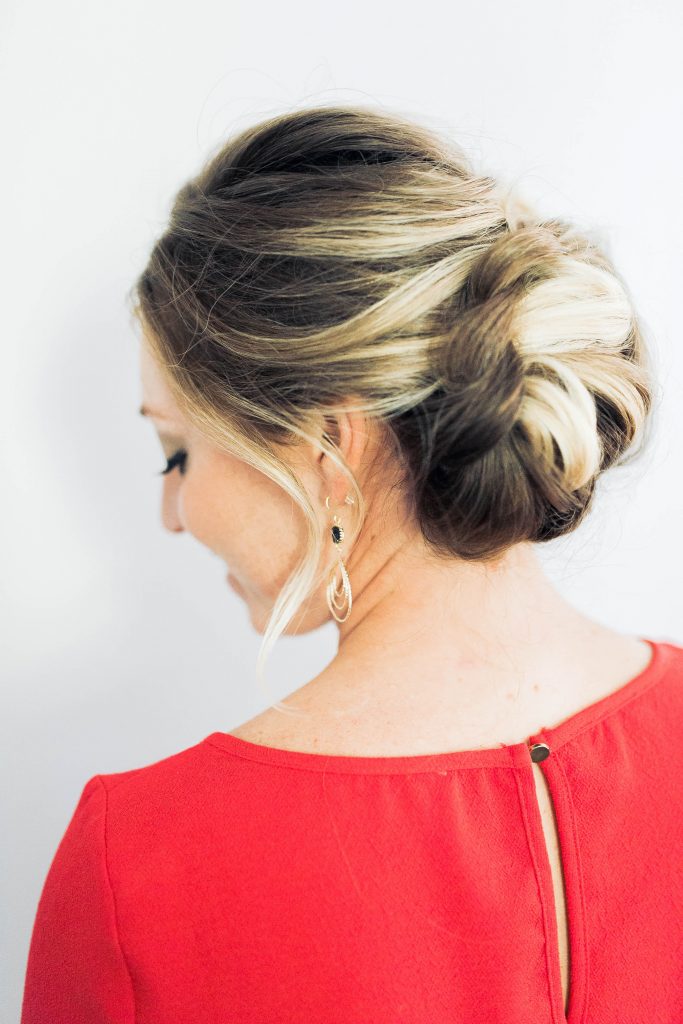
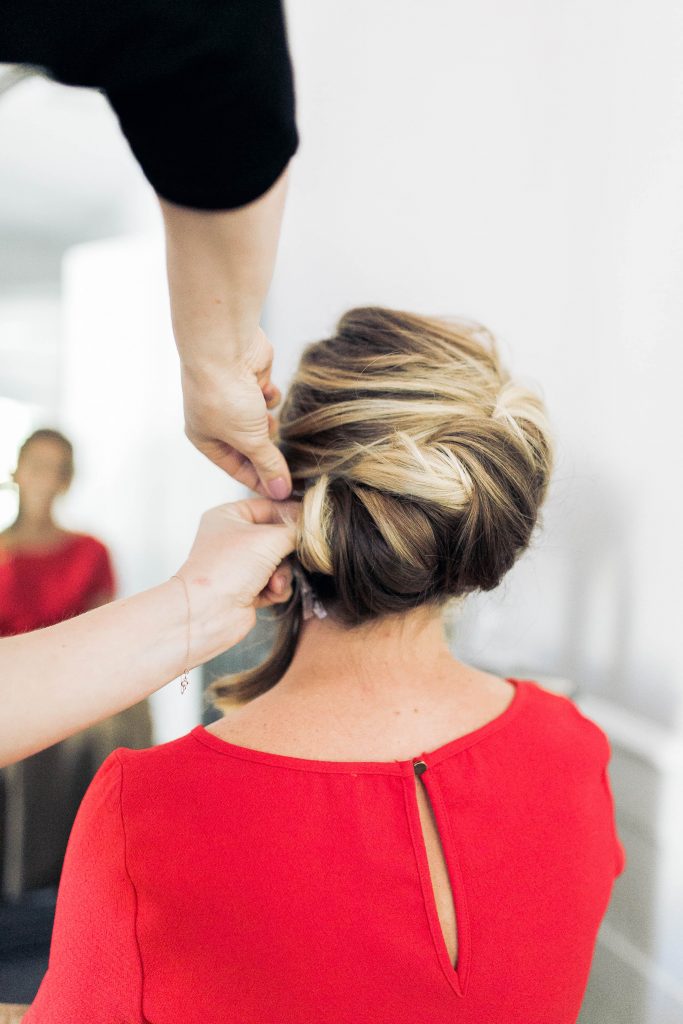
Pull the twist up to lay on top of the rolled section, pinning in place as you set it down.

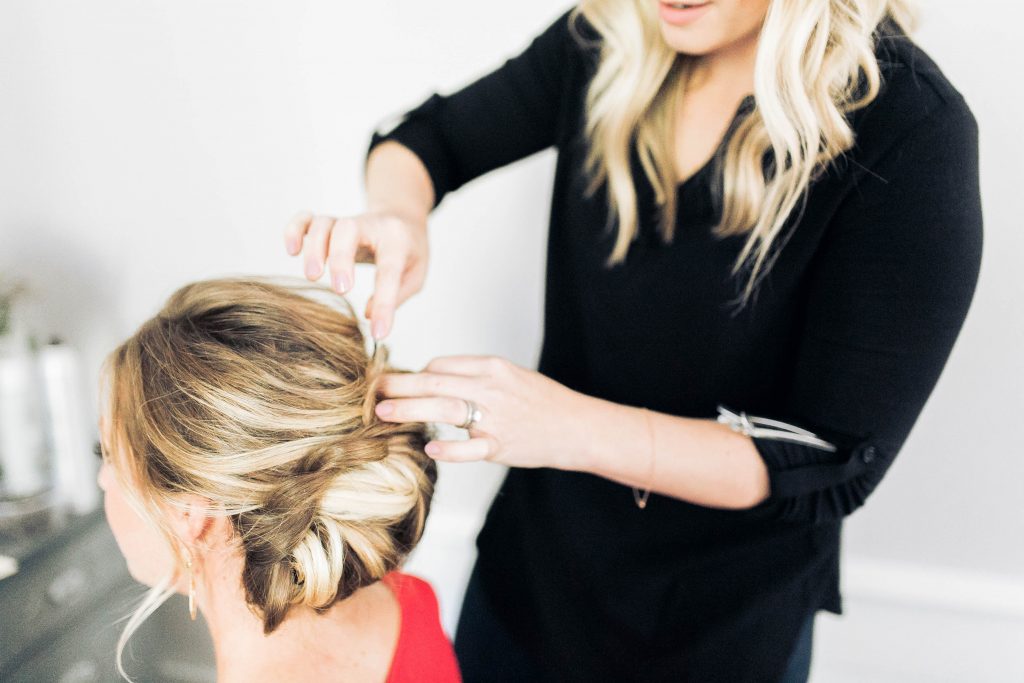
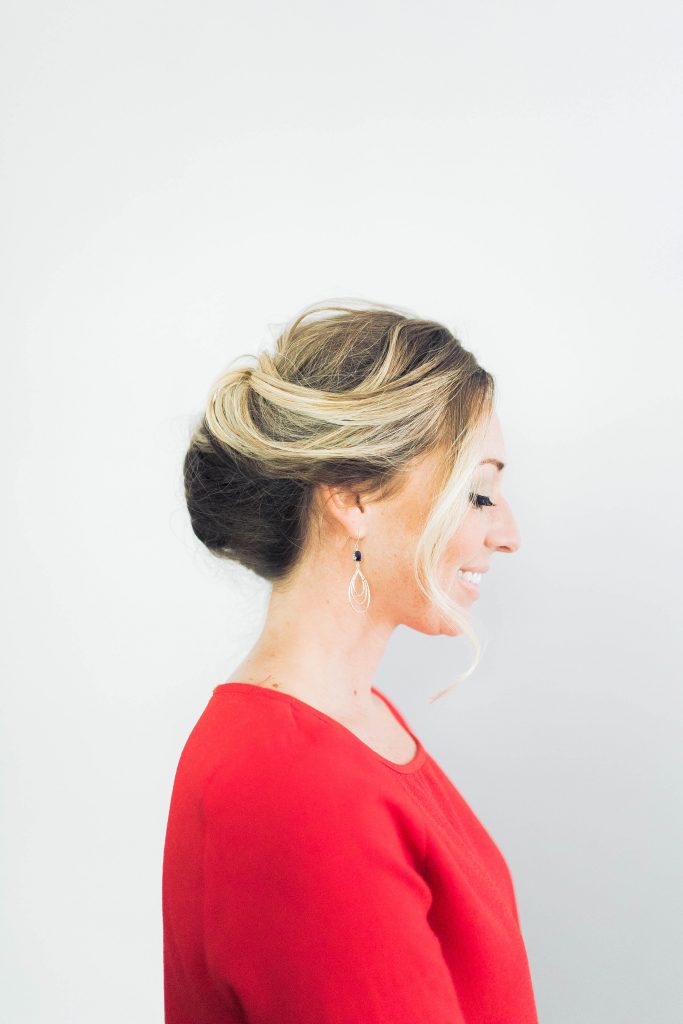

The final result is so fancy and sophisticated. Ironically enough, it was Michele’s (the model) wedding anniversary on the day of this shoot, so she was completely decked to the nines by 10:00am that morning, waiting for her date with her husband later! Her makeup was beautiful, and I loved that Sam went with a nude lip as to not compete with Michele’s red dress (Clinique Matte lipstick in Suede + Benefit Hoola lip gloss)!
You can’t beat a red dress for the holidays either!
I had so much fun working with makeup artists Sam Ray & Teighla Norris, and photographer Jordan Maunder on this shoot of Holiday Hairstyles! The earrings were provided by The Dotted Poppy. Also, big thanks to my beautiful models: Blonnie, Nicole, and Michele!

comments
Wow! Gorgeous 🙂
Love it ! i always prefer a twisted tuck for new year’s eve ! it keeps all the hair up beautifully 🙂
http://www.clairetalksbeauty.com/
Love this look – just wish I had longer hair to try it out! Simple, yet chic.
Blush & Pearls by Angela
This looks beautiful but I could never DIY this. lol
Beautiful!
Can you do a holiday hair tutorial for those of us who have hair just above or below shoulder length? Mine is about 2-3 inches below the shoulder.
Thanks!
I love this but the bobby pins I use fall out and don’t keep my hair secure. Any tips? Better brand of bobby pins? Would love the help! You are so fun to watch on YouTube and snapchat!!!
I love Diane brand and you are probably putting too much hair in the pin!
So beautiful…especially with her balayage…just gorgeous! If I didn’t have a pixie, I’d love to try it 🙂
This is sort of the look I’m going for for my wedding! This is gorgeous!
http://aneducationindomestication.com
this look is perfection kate! I am doing hair for two winter weddings this year and will have to try this out!
XO Lo
thoseprettypieces.com
Wow I love this it looks so sophisticated and beautiful!
ThePaleTails
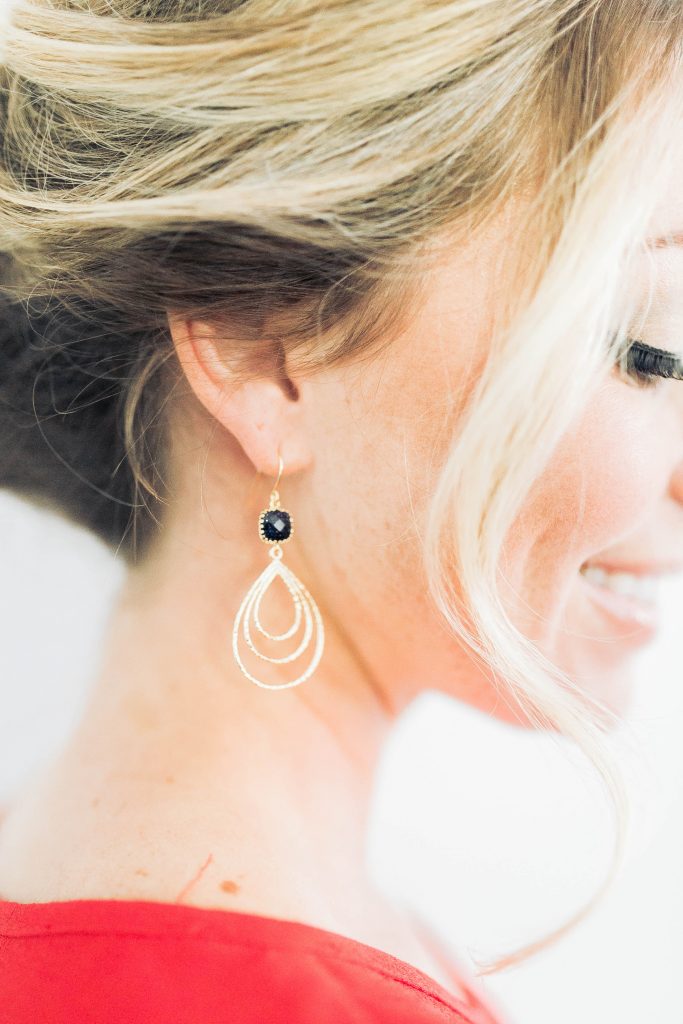
Where are her earrings from?
The Dotted Poppy! 🙂 https://www.etsy.com/shop/TheDottedPoppy
Would still love to see some easy updos for shorter hair that falls between ear and colla illrbone. Models hair is quite long. Thanks!
Absolutely stunning!!!
xo
http://www.polishedplaid.com
I miss miss miss the video tutorial. Too hard to follow in pics for me.
I get the allure of an up-do but with the curls in photo 2 how could you bear to pull them up?!? Couldn’t keep that in! Both looks are beautiful by the way!
: )
IT was hard! They were pretty curls for sure!
Wow, what a beautiful look! Also, the model’s hair color is so cool. I love all the dimensions you see when it’s up!
Katie Actually
Is there a video ?? I find the. So much easier to fallow
beautifully
ve may bay di los angles hang nao re nhat
san ve may bay di san francisco re nhat
In the 7th picture, the one after “Keep repeating that process, anglin down toward the lower left side of your nape” – what did you do with all that hair? You twisted down toward the nape and then you have a handful of hair – do you twist up and pin into the head?